
 Posts
Posts


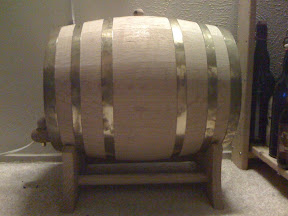
I acquired an oak barrel to age half of my Winter Warmer ale this year to give it that Extra Special Reserve (heh, ESR) kind of a kick.
Well it appears, using the oak barrel, I got more than I bargained for!
This year I did a 10 gallon batch of my winter warmer. 5 gallons got the normal treatment, bottling, and are currently aging. The other 5 gallons instead of going to the bottle spent an extra week in the oak barrel, and then last Sunday were racked to my secondary.
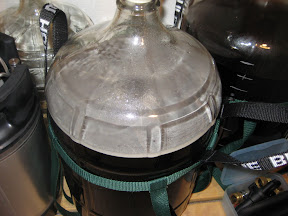
Well, yesterday (Tuesday night) I took a look and the secondary now has a white milky film across the top (Brettanomyces Pellicle). I then took a sample of the film and inspected it in the microscope expecting to find bacteria and a lost batch of beer. To my surprise it wasn't bacteria at all. It appeared relatively the same size as yeast cells, only sausage shaped instead of round like a yeast cell. It was much larger than bacteria, and contained a nuclei so I can pretty much be assured it's not bacterial and is indeed a Eukaryote (see budding yeast cells in image below).
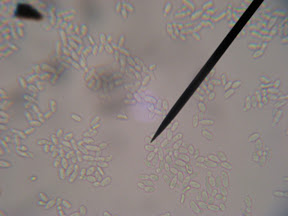
So, that got me on my search to which I found this in the homebrew wiki.
Quote:
"Brettanomyces, often called Brett for short, is a genus of yeast consisting of multiple species found naturally in wood. Brettanomyces contributes distinctive flavors to the beverage it grows in. It gernerally considered an undesirable, spoiling infection by home brewers; however, its extreme, distinctive flavor and aroma is considered desirable in some sour beer styles, and at low levels it is depended on to add complexity to many styles of wine."
Wikipedia adds;
Quote:
The cellular morphology of the yeast can vary from ovoid to long "sausage" shaped cells. The yeast is acidogenic and when grown on glucose rich media produce large amounts of acetic acid. Brettanomyces is important to both the brewing and wine industries due to the sensory compounds it produces.
In the picture of the secondary you can see a white film that has formed on the racked beer. Interesting enough the purpose of this "white film" or "velo de flor" of yeast gives the beer protection from oxidation and other infections by preventing air from contacting the wort. This is indeed going to be some strange brew, but the technique of using "wild" yeast (Brettanomyces in this and most cases, and sometimes the bacteria Lactobacilus) is not an uncommon one and is done in a very sought after style of Belgain beer refered to as a lambic.
Since my winter warmer is indeed a sort of spiced up brown ale (with cloves, cinnomon, nutmeg, to name a few), I figured I'll roll with it and see how it turns out. It seems to be a very fitting style for this experiment.
I have put a previous batch (another brown ale) through the barrel already, and the same thing happened, though I ignored it as a mild infection and bottled it. The Brown was a little sour, and very complex, and actually pretty good after it aged a few months.
After the brown ale "infection", as I assumed, I went ahead, and just sanitized the barrel really well with Potassium Metabisulfite and let that sit for a few months prior to my Winter Warmer figuring that would be enough to pretty much kill anything. Apparently it doesn't kill Brettanomyces in the dosing regiment I used (1/2tsp Potassium Metabisulfite per 5 gallons) like it does normal yeast and bacteria. Apparently even most sanitizers will not kill it, though I've heard rumors that StarSan will, and other sites confirm that Sulfur Dioxide does.
As for the barrel, there is no way of ever ridding it of it's personal yeast. Being porous by nature, the wild yeast more than likely is embeded deep in the wood, and has been there from the beginning of the life of the forest it came from. So I do expect to do some very interesting lambic fruit styles in the future using nothing but the barrel as the yeast source.
As for the Winter Warmer, I got a 25ml sample to try. The smell was good, alcohol (it is near 9% after all), oak'y, special spices, cloves, wintery, a hint of sourish-ness but nothing harsh. Something to be excited about!
Overall, nothing taste or smells out of whack, pretty much like I expected it to taste. So cool, well see how it ends up! Should be an interesting result.


